Some of the projects I work on in my free time are completely on impulse. Usually there is little planning, most of it happens in my head. I like working on these types of projects sometimes. If I am looking for something to do I will design something randomly and see how it turns out. It serves as a nice productive use of downtime whenever I have some (which is in short supply). Plus it allows me to delve into different manufacturing methods without worrying too much about wasting many resources if things go wrong. I have donned these types of projects "Quick Projects" due to the fact that I have completed these projects in a short time period with just a little bit of preparation.
Terrier ID Holder
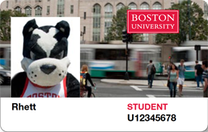
The Idea: As a student at Boston University, I am issued an ID card that serves as my student ID, a key to access rooms/buildings I am authorized to be in including the on-campus dorm/apt buildings, and as a debit card of sorts. Hence this card is super important to have on my at all times. At first, I kept it in my wallet as this was the natural storage place. However, I was getting tired at taking it out every time I needed the ID. Therefore I decided that it would be worth designing and 3D printing an ID holder that could be fitted to my key chain for easy access.
|
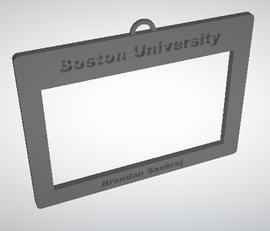
The Design: As I was brainstorming ideas, I had a few considerations in mind:
|
|
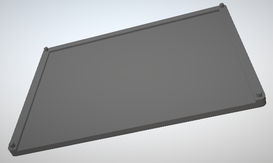
Printing and Post-Processing: It turns out that I had to reprint the two pieces a couple times. The first time I had accidentally scaled on of the pieces incorrectly and therefore it was the wrong size. The second time the print failed due to the printer breaking and I had to go find another printer. However the two pieces finally printed and it was onto the next step, post-processing.
The surface of the 3D print was rough and I was worried that it would damage the metal strip on the back of the ID every time I took it in and out of the holder. Therefore I did the following:
The last thing to do was to fix the two pieces together. For this I used hot glue as it was readily available. I applied a thin layer to the edges such that none would leak into the cavity where the card would lay. One it solidified, I applied hot glue tot he edges in order to increase the strength of the connection. Then I sanded it down a bit and painted it so that it was as if it was all one part. Finally, I attached the key chain ring. I widened the hole that was printed a bit with a drill and attached the key ring. I also added a small spring to the ring which would be attached to the key chain in order to have a retractable mechanism. And with that the holder was done!
The surface of the 3D print was rough and I was worried that it would damage the metal strip on the back of the ID every time I took it in and out of the holder. Therefore I did the following:
- I sanded down the pieces in order to smooth out the surfaces.
- I applied a 3D print coating. This coating is a resin like material that first needs to be mixed together and applied to the print. After sitting over night and treating all sides of the print, the pieces were left with a nice smooth surface.
The last thing to do was to fix the two pieces together. For this I used hot glue as it was readily available. I applied a thin layer to the edges such that none would leak into the cavity where the card would lay. One it solidified, I applied hot glue tot he edges in order to increase the strength of the connection. Then I sanded it down a bit and painted it so that it was as if it was all one part. Finally, I attached the key chain ring. I widened the hole that was printed a bit with a drill and attached the key ring. I also added a small spring to the ring which would be attached to the key chain in order to have a retractable mechanism. And with that the holder was done!
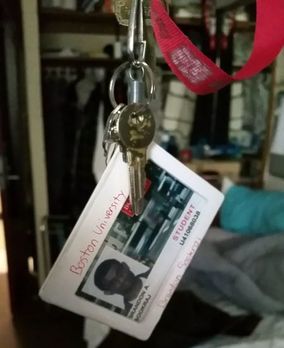
The Holder Today: I continued to use the holder until about a month ago, which would be the end of my Junior year, where the two pieces of the holder split apart. I decided to not fix it because my keys would scratch the exposed surface of the front of the ID card when it was in its holder in my pocket. If I were to redesign the holder, I would add a clear screen or thin acrylic to the window of the holder to prevent this. Also I would maybe use a stronger adhesive to bond the two pieces together. Lastly, I would do a better job of sanding and applying the enamel coating for the surface was rough in places and after a year the paint showed signs of chipping.
Fuse Earrings
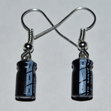
The Idea: This is an example of a very spontaneous project with little planning. During the summer before my Junior year of college, my girlfriend at the time had a very neat pair of earrings that were made from capacitors which I though looked pretty cool. At one point we had to go to the hardware store and get something and she mentioned that earrings made of fuses would look just as cool. This gave me the idea to make her a pair. So I told her to pick out a couple fuses that she liked and I decided to get to work and making them wearable.
The Design: The design of the earrings was rather simple. After I got the earring I picked up a packet of French hooks and mounts for earrings at a locate art supply store. One morning before I had to help run a summer camp, I had about an hour to kill and I remembered that I had the materials on me. I took them out and tried to figure out a way to attach the hooks to the earring while still allowing to swivel. At first the idea was so just solder them onto the fuses, but the earring would be stiff. Therefore went with plan B, I grabbed a drill and bit about the size of the earring hook mounts and drilled a pair of small divots into the metal of the fuse on opposite sides near the top. Then I took the hooks with the mount attached and used a pair of pliers to crimp the mount into the two holes I drilled. This resulted in a secure fit that would not slip out and allowed the earrings to dangle freely. After doing this for both of them I ended up with a decent pair of earrings.
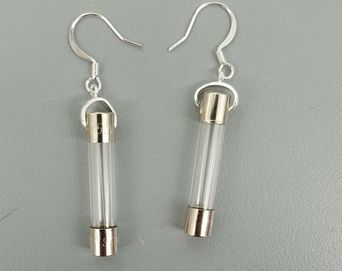
The Earrings Today: That weekend I gave the earrings to my girlfriend, she said she absolutely loved them. She still wears them to this day a year later and still gets complimented on them. I think it was pretty cool that I made something like that, a very simply concept and low cost but still very aesthetic and usable. It gave me the idea that I could market things like this and make a little cash on the side, but I never capitalized on that idea...yet.
